Showing posts with label art. Show all posts

Friday, June 6, 2014

DIY: Glitter Wine Bottle

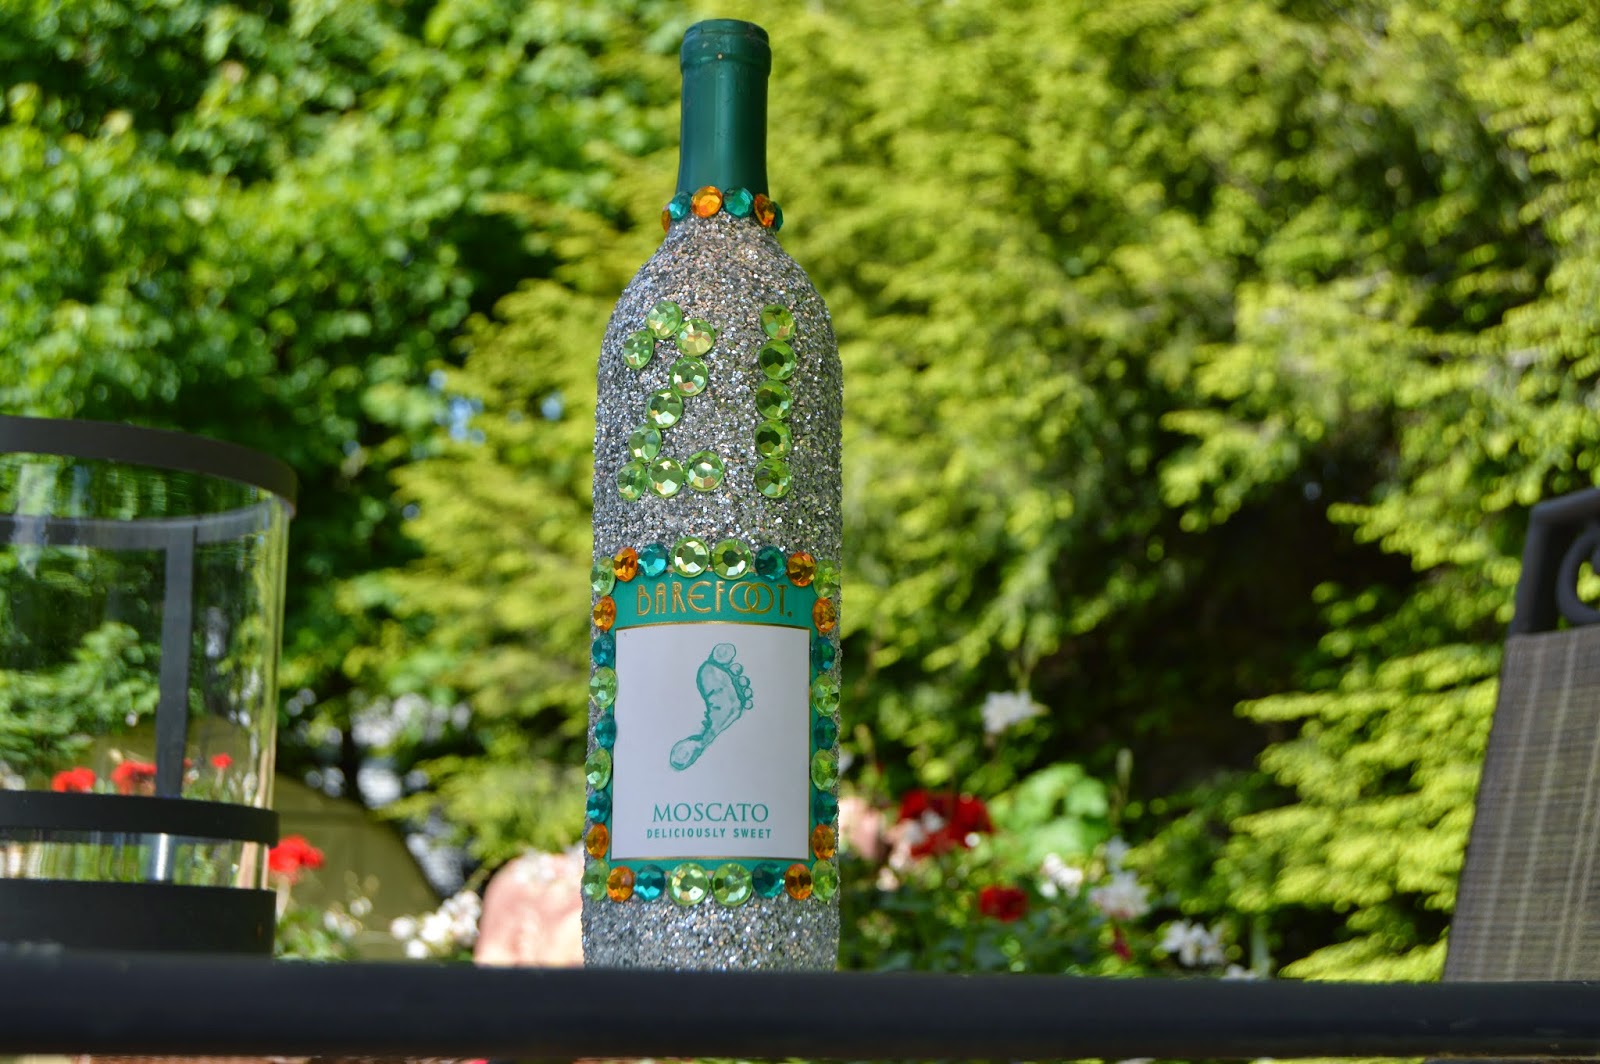
Hello friends! It was an exciting week for me as one of my besties turned 21 on Tuesday! And what do you give the ultimate girly girl for her 21st? A bling-ed out wine bottle of course! I had so much fun making this and now I'm constantly looking for things I can add glitter to because I have sooooooo much extra glitter. It was easy to make and my friend absolutely loved it, so it was time well spent!


I'm very proud of the finished product, but it obviously didn't start out looking like that! I have the project supplies are listed and pictured below. I overestimated how much glitter/mod podge I needed so I could have downsized and saved some money, but all the supplies came it at about $20 (excluding the wine)


Supplies
An item to decorate (I chose a wine bottle)
Glitter
Mod Podge Glossy Finish
Sponge Applicator
Gems (optional)
Tacky Glue (optional/not shown)


My sister got some action shots of me applying the glitter, so hopefully this gives you a good visual of what I was doing. It was a pretty simply method if I'm being honest. I worked in sections and applied a medium layer of mod podge and then just sprinkled the glitter over it using my fingers. 

I didn't want to gloop on the mod podge but I wanted enough so that the glitter would actually stick. I think after a section or two you get a feel for what is the ideal amount. I also think it would have been easier if I had gone for a smaller sponged applicator. I thought it would be more convenient to have  large one to cover more surface area at once, but it didn't quite fit in the jar of mod podge so it kind of created a big gluey mess.


After I sprinkled the glitter on the bottle, I shook it and blew on it so that all the extra glitter would flake off. I worked over newspaper but I still made quite the mess! Although I will say that the shape of the bottle made it pretty easy to work with since I had something to hold onto that wasn't being coated.


After you finish covering all the areas with glitter, you can use the mod podge to seal the glitter so it doesn't flake off. It is very important that you choose the mod podge with the glossy finish for this because it will preserve the shininess of the glitter. I just used the sponge to kind of blot/stipple it on top of the glitter (I figured this was more gentle than stroking it on) and it dried clear and kept the glitter in place!

It's also important to note that mod podge is not just regular glue. I don't believe using craft glue (especially as the sealing layer) would have the same effect.

The picture above is what the bottle looked like after I sealed in all of the glitter.


Now comes some more optional decorating! If I had been doing something for my home (like a vase or a make-up brush holder) I might not have gone for the gems, but 21st birthdays call for tackiness. 

I went for clear tacky glue because I didn't want any residue when it dried. It worked out really well and all of the gems stayed on during transport. I would say be a little more generous with the glue than you think you do (especially if it's going to dry clear anyway) because the glitter is a textured surface and it really needs to seep into all the nooks and crannies. 


What do you think of the project? What should I add glitter to next? Let me know in the comments!


Tuesday, May 20, 2014

DIY: Crayon Art

Hello friends! I know that this DIY isn't exactly new or anything, but I made these almost 2 years ago and their still one of my favorite things that hangs in my room. As a person of the internet I've seen a lot of crayon art, but I've actually never seen anything quite like these ones. I'm pretty proud of them so I thought I'd let you guys in on the secrets of how they came to be!


Supplies:
Canvas (size of your choice)
Crayons (I used a 64 pack for each)
Hot Glue Gun
Duct Tape
Exacto Knife
Hair Dryer
Sharpie/Pen


First you need to choose your design, preferably something you can figure out how to draw or trace. I actually free handed the mockingjay so I didn't need to trace it.

To make the duct tape stencil, take strips of duct tape and make a square large enough to draw your design. You should do this on a surface that you don't care about and not on the canvas itself because the Exacto Knife will ruin it. Make sure to overlap the strips so they stick together and you'll be able to peel them up in one sheet. This will actually be pretty easy if you start peeling with the first piece you laid.

Next you need to draw your design onto the duct tape. Like I said, I was able to freehand the mockingjay but I did trace a plate to get the perfect circle of the ring. I started with pen and then once I got it looking how I wanted I went over the final lines in Sharpie so they'd be easier to see. Then I went over the Sharpie lines with an Exacto Knife which made it really easy to peel away the parts that I didn't need.

I hot glued my crayons to the canvas before I moved the stencil over but I guess the order doesn't really matter as long as you leave enough room for the crayons at the top. I went with the classic rainbow but my friend who I did it with used all green and hers also looked really nice so I think that's a great way to customize!


Once all your crayons are glued to the canvas and the stencil is on you can start with the blow dryer. Be careful with where you do this. We laid down newspaper to protect the table but some actually got on the walls a little (not terrible to get off if you wait till it dries but I wouldn't want to mess with white walls).


Once the wax is dry you can peel up the stencil and reveal the awesomeness underneath! A little bit of the color got behind the stencil but I think it actually looks cool like that.

Have you been doing any DIYs lately? Let me know if you try this or if you've done another project that you're proud of because I'd love to see it!


Tuesday, February 11, 2014

Painting Adventures

So instead of keeping up with my homework, I completely ignored my responsibilities this afternoon and finally did the YouTube Tutorial I've been meaning to try. It came out pretty good if I do say so myself! Of course now I'm paying the price for an afternoon spent lolly-gagging as I sit here trying to force myself (while failing miserably) to trudge through the final 10 pages of academic journal articles for tomorrow morning's class. Second semester of senior year is NOT turning out to be the slide that I thought it would be. But oh well, I guess I can sleep when I'm dead.

lolololol at that last statement since anyone who knows me in real life knows that I sleep approximately 9 hours a day and am loving life. Anything less than that puts me on the struggle bus hardcore.

But here's the final product! Giving it to the boo for Valentine's Day.


Let me know if you've been working on any projects lately!